-
 Marcel EversFront-End Developer, info.nl


Content synchronization module: Get production content on testing environments
This blog post by Marcel Evers from info.nl looks at how the content synchronization module allows you to easily get fresh production content on your testing environments in Magnolia CMS.
To be able to perform proper regression testing when introducing new features in your CMS, you need to have your latest live (production) content on one, or even all of your other environments in your DTAP environments set up.
Repeatedly aligning your content manually can become quite cumbersome
Magnolia CMS provides super easy content exporting and importing functionality out-of-the-box using .XML or .YAML files. With sufficient rights, you can export and import complete workspaces or parts of them from the JCR tools exporting tab. Also, if these options are enabled, you can do the same from the context menu in any content app. This is a great way to manually copy production content to your acceptance or testing environment for regression testing.
But once your development practices become more agile and new functionality needs to be tested every sprint, exporting and importing content manually can rapidly become quite cumbersome. Especially when you need to copy multiple trees and/or workspaces to multiple environments. This is where the Content Synchronization module can simplify and speed up synchronizing content. You only need to set it up once and the whole process can be run automatically.
The process of synchronizing content
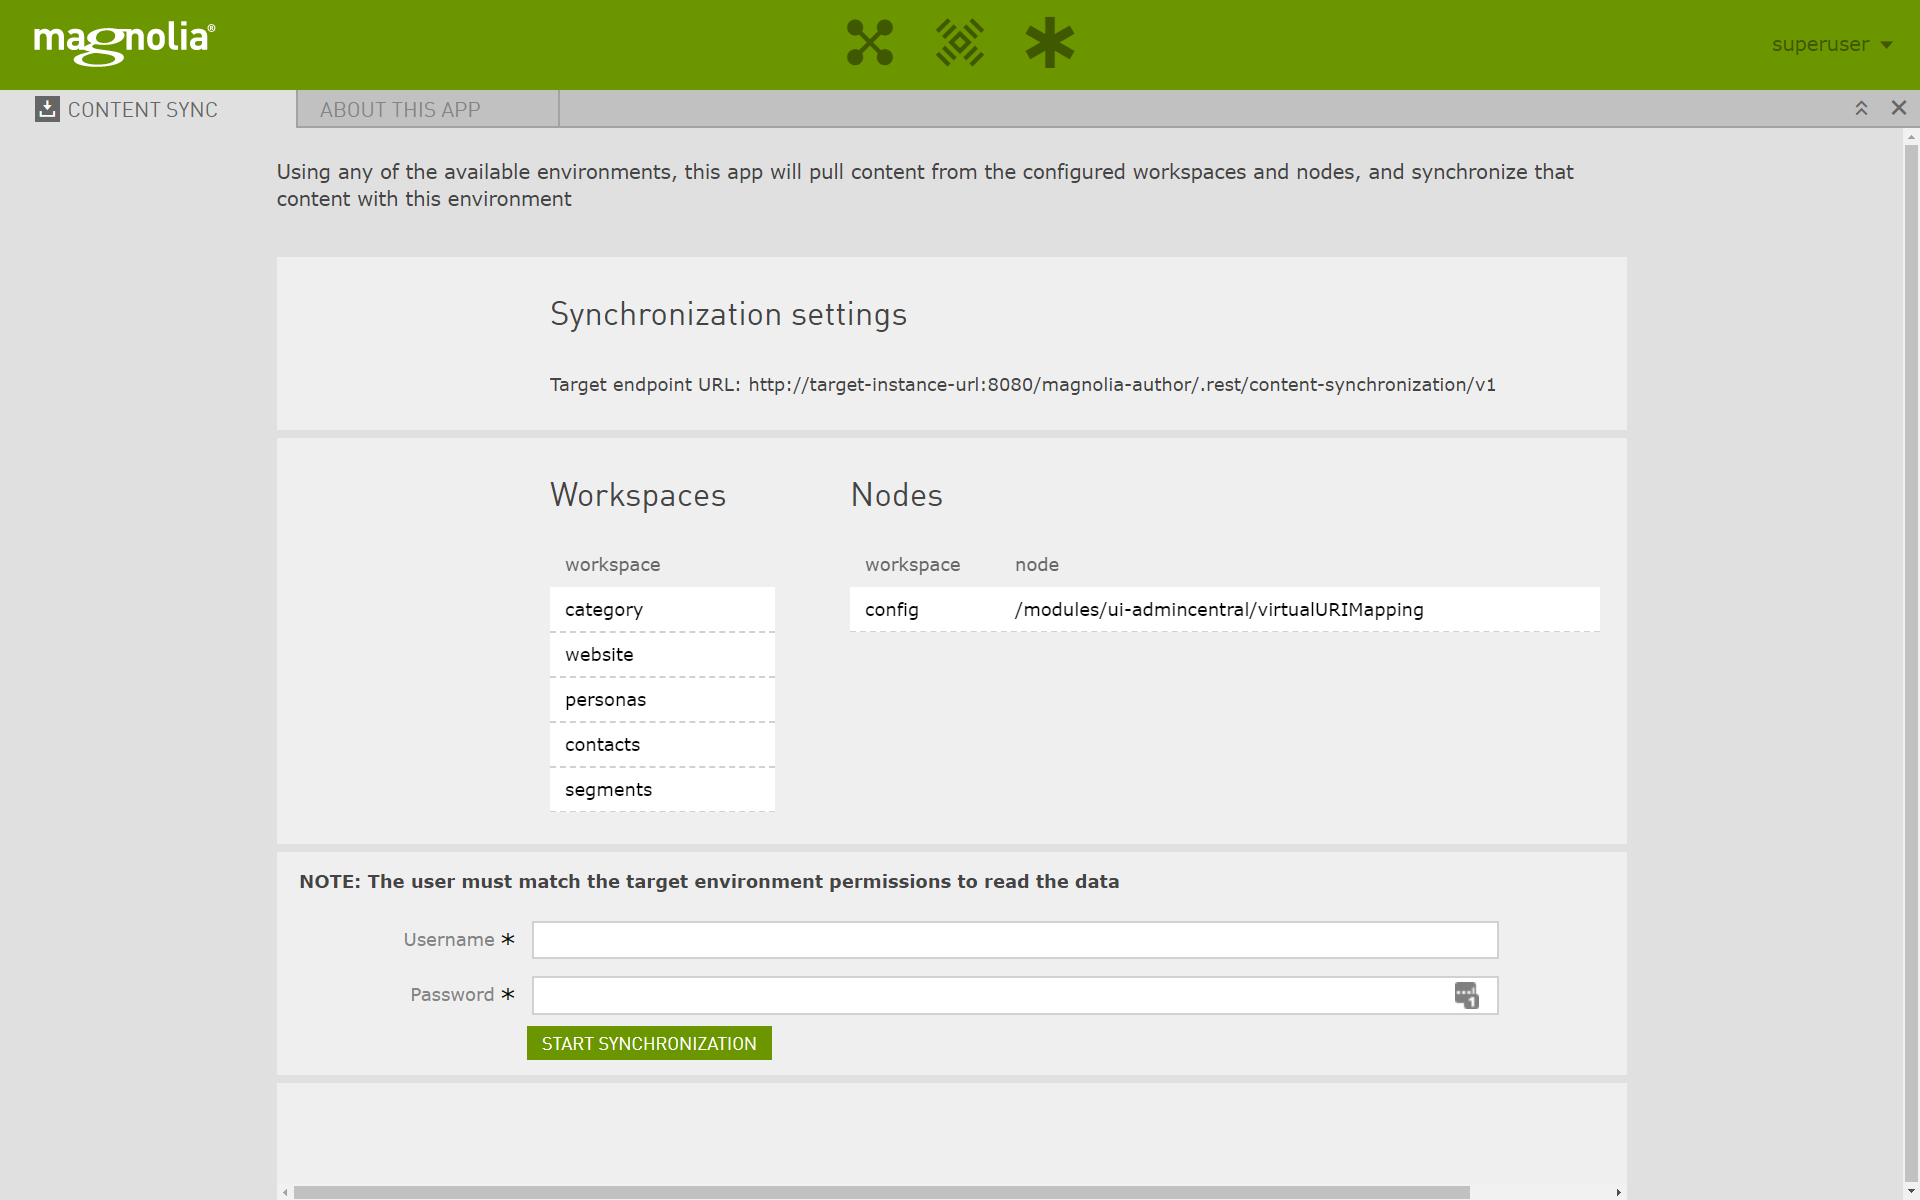
Say you need to have production content on your acceptance environment. In this case, production acts as the data source (export), and acceptance as the data target (import). To execute the synchronization of content, you log in to the Magnolia Author of your acceptance environment. From there, you open the Content Synchronization app, provide the credentials of a user which has rights to read all configured workspaces and its node paths. Then click the sync button. That’s all, now the module will automatically remove all content from workspace (or node) and copy all the content from production to your acceptance environment. When it has completed, a popup message is shown stating the result.
Setup
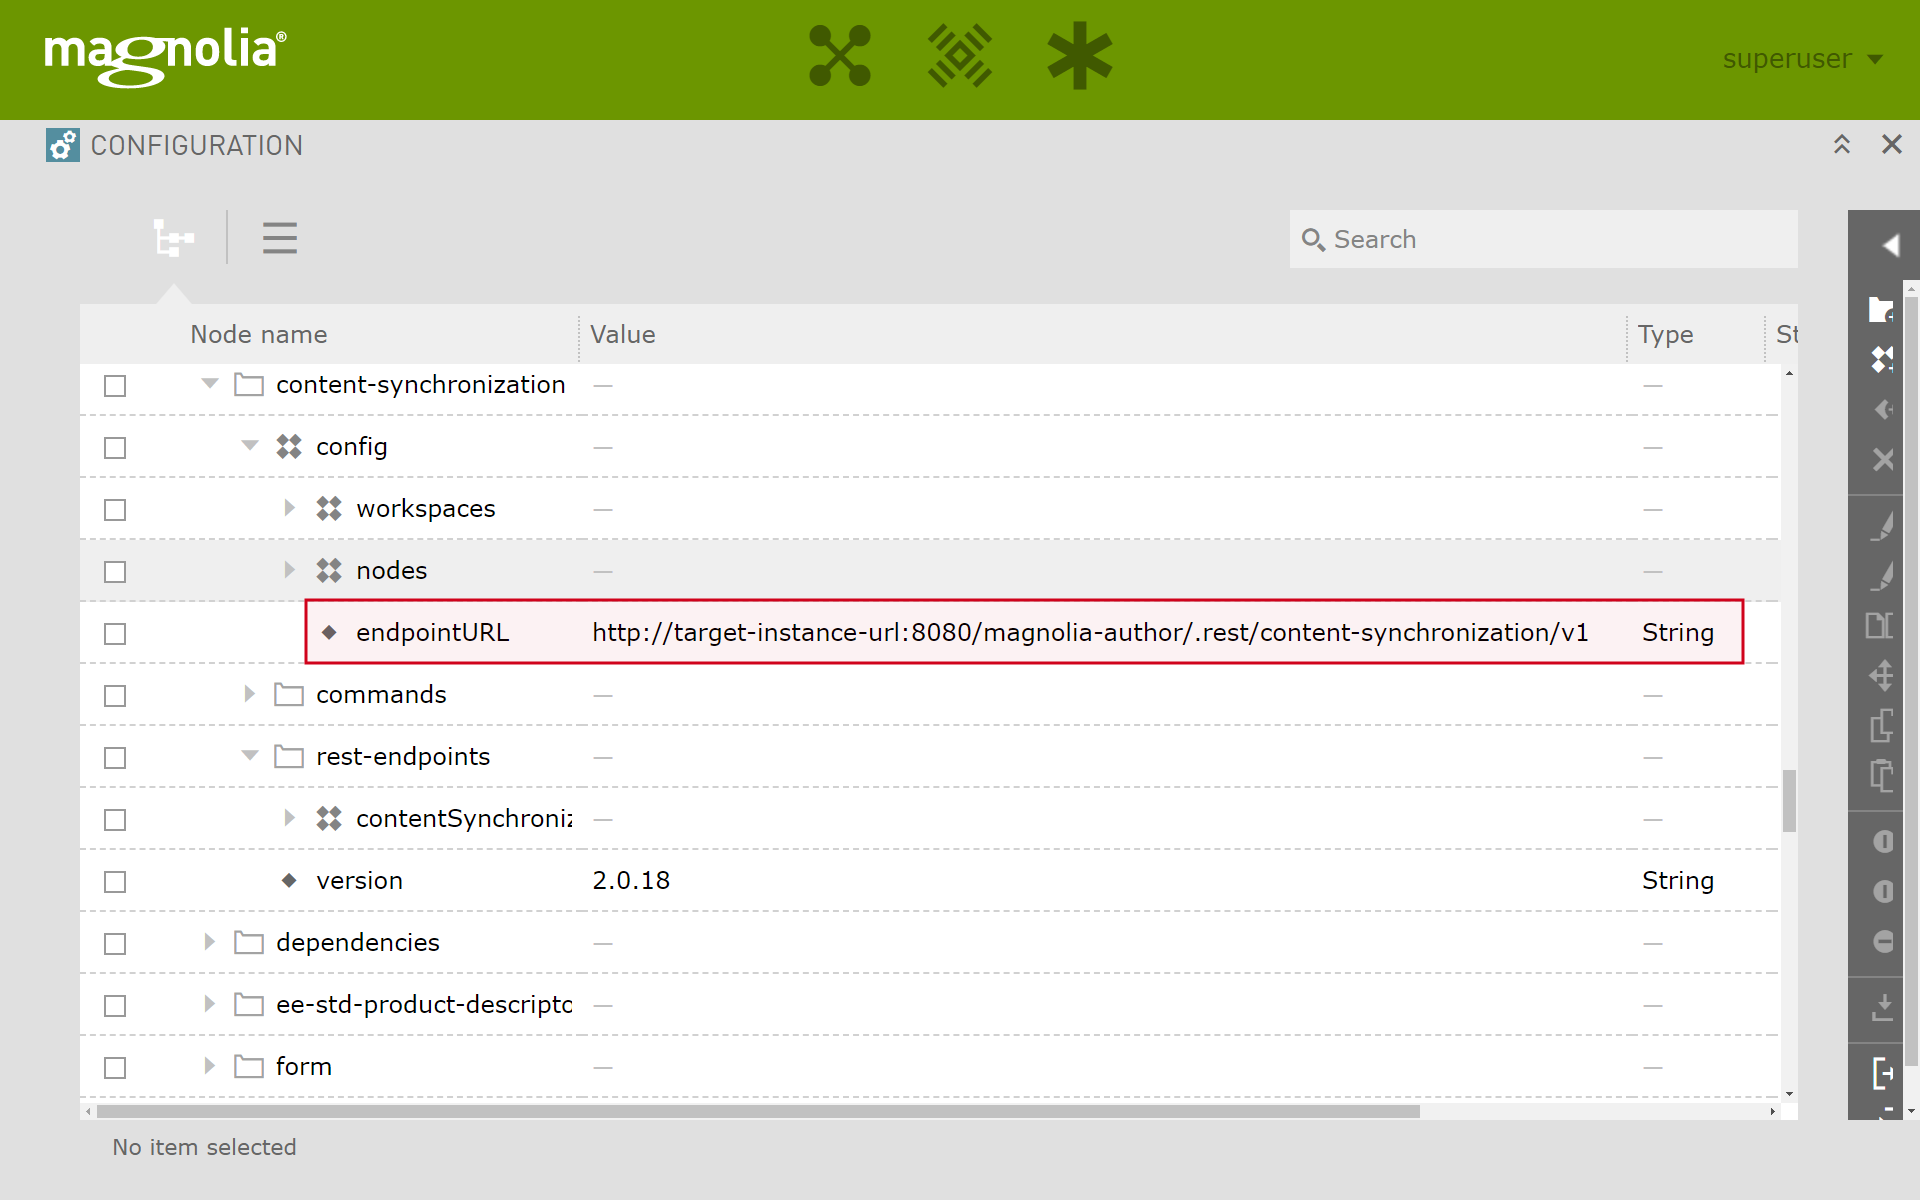
The Content Synchronization module can be configured from the Configuration app as it reads its settings from JCR. In the Magnolia Author of the data target environment, you first need to set the data source URL. Then you need to configure which workspaces and/or specific nodes content needs to be synched for. With that configured, the module is ready for use.
Notes
In the current version, all imported nodes are published: no exception, even if those were unpublished at the target environment. This is something that would be nice to improve in the future.
Pulling data from the DAM will most probably fail if it contains too many assets, because the data transfer is too large. Again, a nice possible improvement for the future.
So, install the Content Synchronization module now and always test using ‘fresh’ production content to mitigate the risk of regressions introduced by the introduction of new features.